Checkify
JavaScript SDK — production ready

Build Checkify into your own app or website.

One Checkify Pass per site. Your page chooses the proof — human, age 18, or age 25 — when the user starts verification. Drop in the embed snippet and verify the result on your server.

Quickstart
<script src="https://checkify.me/sdk/v1/checkify.min.js"></script>
<div data-checkify-pass="chk_live_YOUR_PASS_ID" data-checkify-request="human"></div>

Create a digital site in the business dashboard, copy your Pass ID, register the domains where the embed will run, then paste the snippet below. Optional DNS, meta tag, or file verification increases assurance but is not required for the embed to work.

Need help? Email support@checkify.me or open the Checkify Passes tab after signing in to copy your Pass ID and integration snippet.

Integration flow
Site → Pass ID → SDK → Server verify
Live
Developer flow
Create digital site Live
Copy Pass ID Live
Add SDK embed Live
Verify on your backend Live
1
Create site
2
Add SDK
3
Verify
Embed
SDK live
Verify
API live
Overview

One Pass per site. Request type on your page.

Checkify auto-provisions one reusable Pass ID when you create a digital site. You keep the same Pass ID everywhere on that site — checkout, login, registration — and set data-checkify-request where each proof is needed. No per-form launcher setup.

1

JavaScript embed

Auto-mount widgets or bindForm for login, signup, checkout, and contact forms. The SDK handles the button, hidden checkify_token field, and submit state.

Available now
2

Server verification

Call POST /v1/qr/results/verify with your site API key and the request_id from the hidden field. Never trust the browser alone — verify before signup, checkout, or password reset.

Available now
3

WordPress & WooCommerce

Install the Checkify plugin, paste your Pass ID, and choose human or age checks on the pages you protect. Same one-pass model as custom sites.

Available now
One-pass model

How Checkify Passes work today

Sites, Passes, and proof requests are separate layers. This keeps WordPress plugins, WooCommerce, and custom sites simple: one ID to copy, many places to use it.

1

1. Create a site

Register your business, add a digital site, and list allowed domains (for example example.com and www.example.com). Each site gets exactly one Checkify Pass.

2

2. Copy one Pass ID

Find your Pass ID in the business dashboard under Checkify Passes or Developer. Use the same ID in your website, plugin, or backend integration — it does not change when you switch proof types.

3

3. Choose request type in code

Set data-checkify-request to human, age_over_18, or age_over_25 on each embed or bindForm call. Human checks are usually free; age checks consume credits when approved.

Request types

data-checkify-request Typical use
human CAPTCHA replacement, bot reduction, frictionless human check
age_over_18 18+ checkout, restricted content, age-gated signup
age_over_25 Challenge 25, higher age thresholds
What's available

Integration options

The JavaScript embed and server verify endpoint are live in production. Use the business dashboard to create sites, copy Pass IDs, and issue site API keys.

Mobile app handoff and npm packaging are on the roadmap. Everything you need for website integrations works today with the CDN script and REST verify API.

Available today

JS
JavaScript Web SDK
CDN script for websites, forms, checkout, and custom flows. Pass ID + request type per embed.
Available now
API
Server verify API
POST /v1/qr/results/verify with Authorization: Bearer YOUR_SITE_API_KEY. Docs and code samples in the developer guides.
Available now
App
Mobile app integration
Launch Checkify from native apps via QR or deep link. Guide and SDK packaging coming soon.
Coming soon

Legacy launcher IDs are deprecated. Use Pass ID + request type for all new integrations.

How it works

End-to-end integration

Four steps from site setup to a verified user on your backend. The Pass ID stays constant; only the request type and server verify claims change per use case.

Step 1

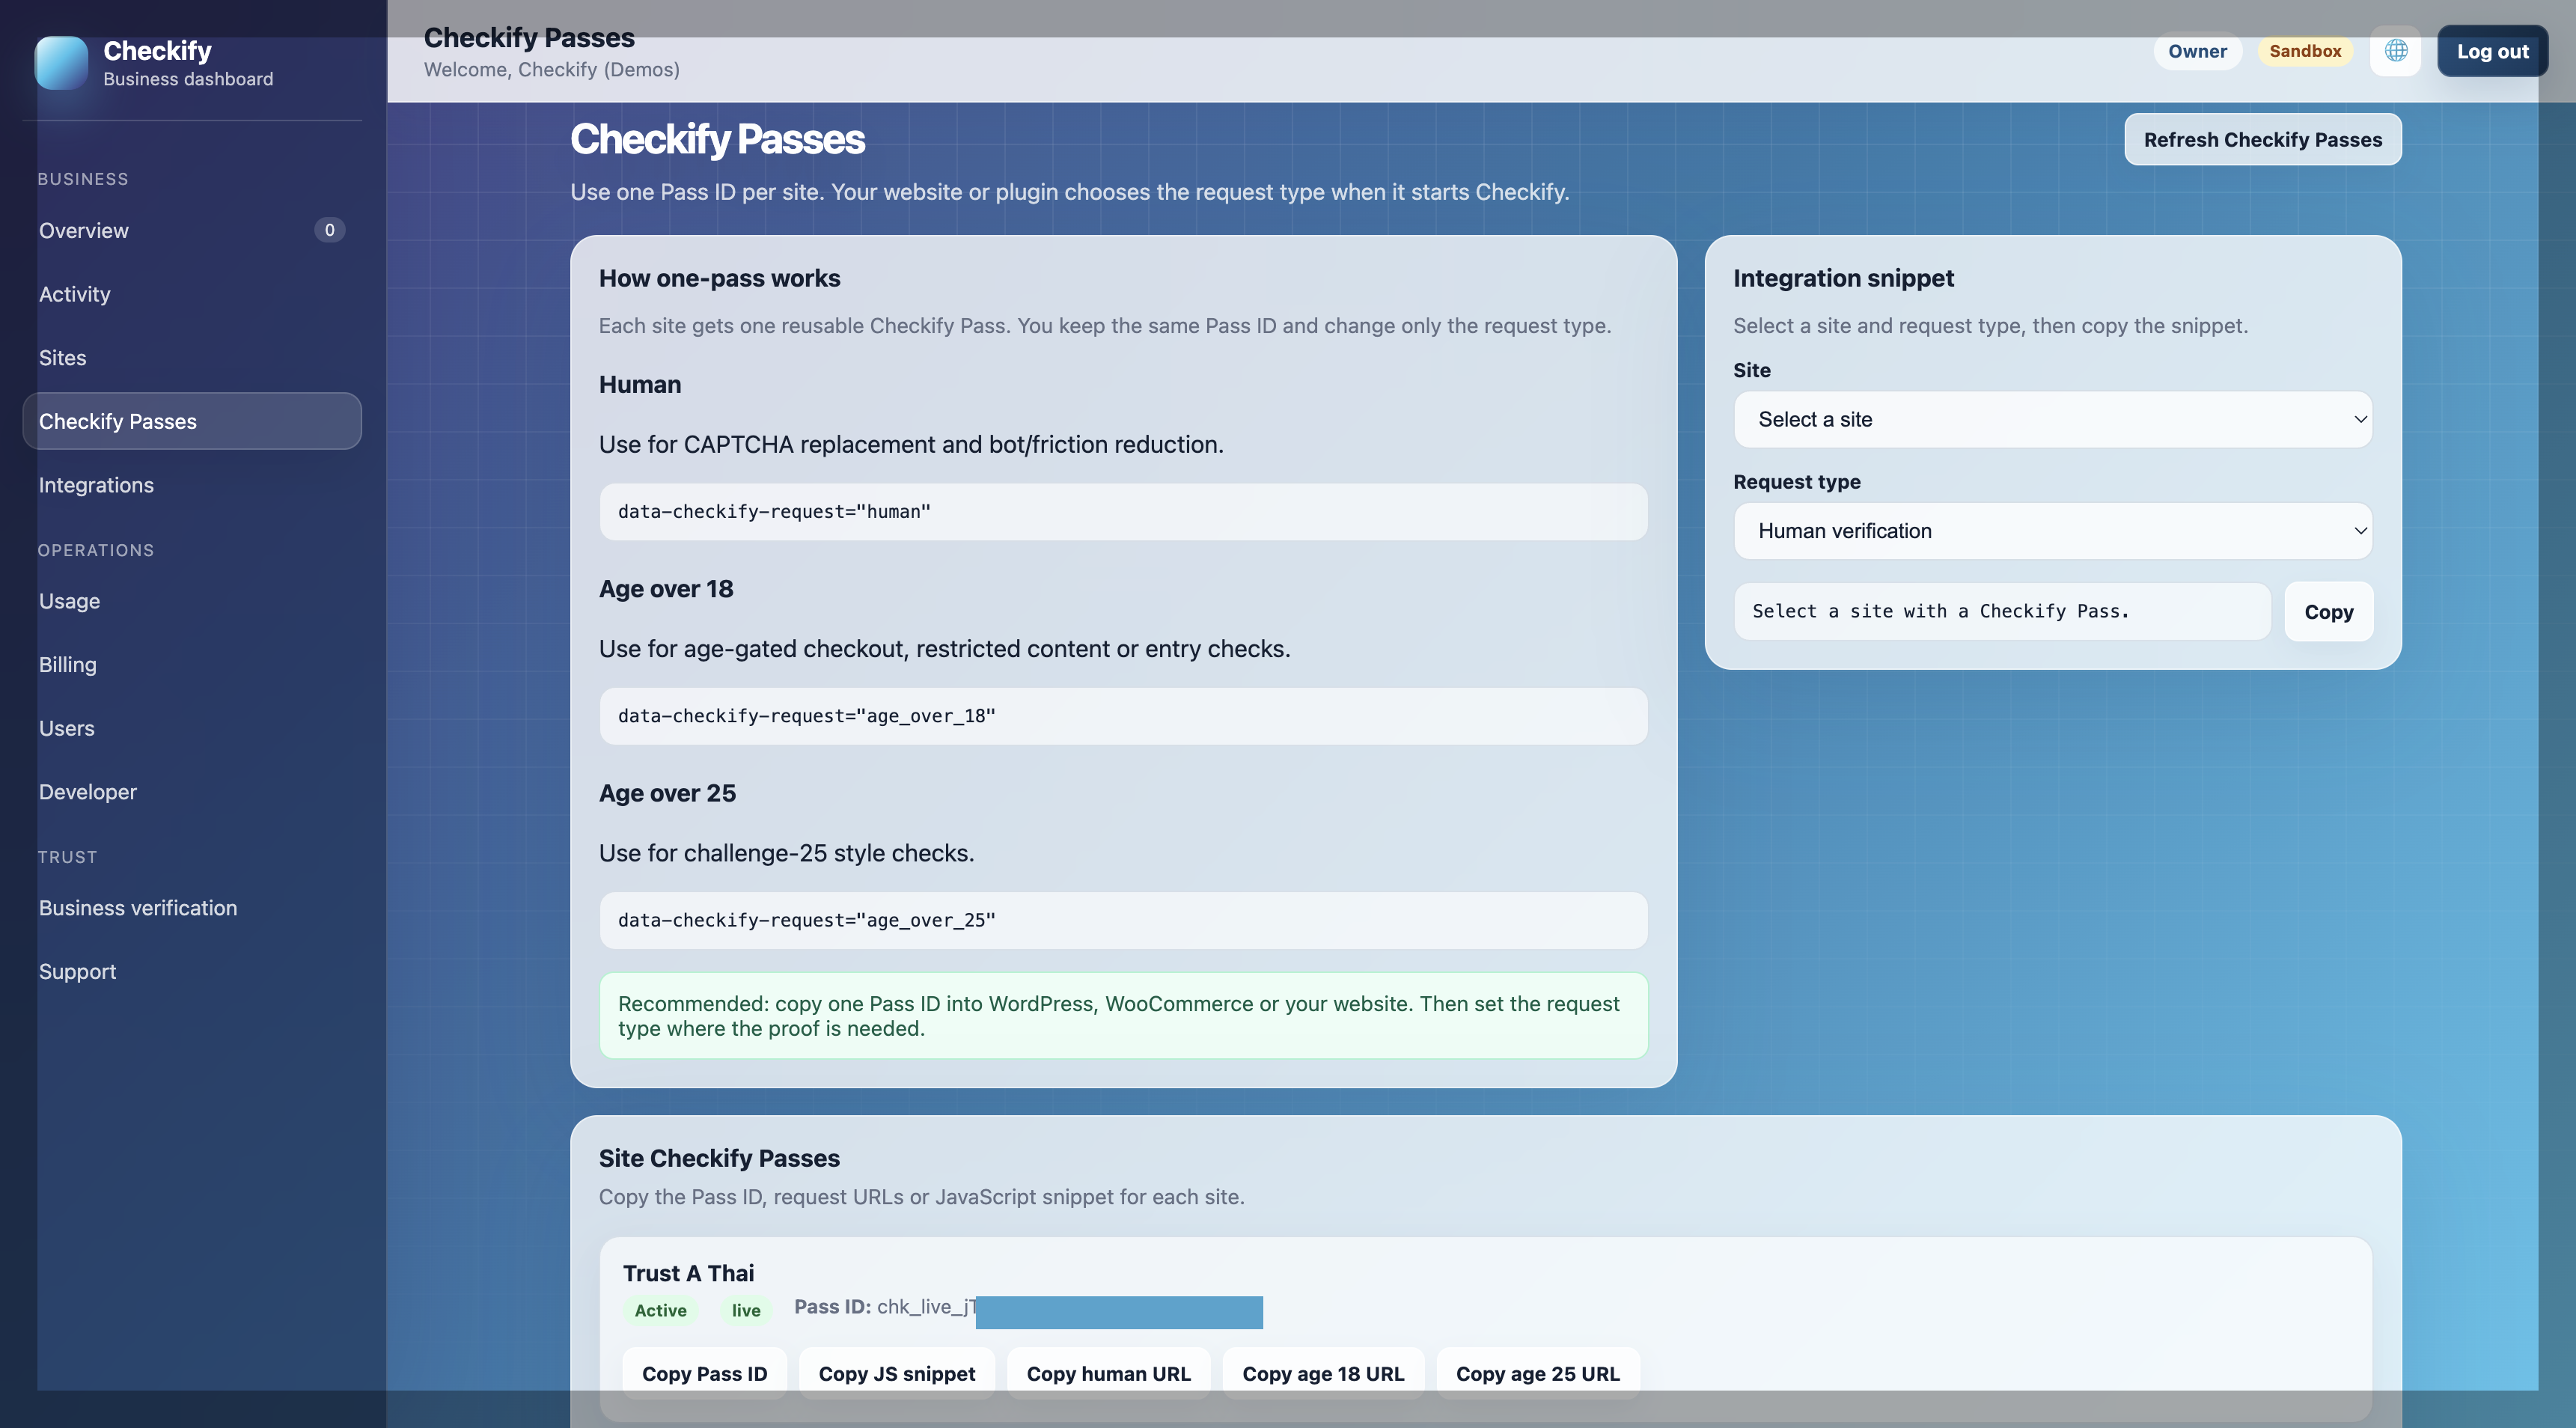
Create a site and copy your Pass ID

Sign in to the business dashboard, open Sites, and create a digital site with your allowed domains. Checkify creates one Pass automatically. Open Checkify Passes to copy the Pass ID (chk_live_…) or grab the ready-made snippet.

One Pass, many uses

Same Pass ID on login (human), checkout (age_over_18), and staff-only pages (human) — change only data-checkify-request per embed.

Available now: Sites + Checkify Passes in dashboard
Create site and copy Checkify Pass ID

Step 2

Add the embed to your page

Load the SDK from checkify.me and mount a Pass widget, or use Checkify.bindForm for forms. Replace YOUR_PASS_ID and set the request type for that page or action.

Minimal embed
<script src="https://checkify.me/sdk/v1/checkify.min.js"></script>
<div data-checkify-pass="chk_live_YOUR_PASS_ID" data-checkify-request="human"></div>
Available now: JavaScript embed + bindForm

Form binding example

<script src="https://checkify.me/sdk/v1/checkify.min.js"></script>

<div
  data-checkify-pass="chk_live_YOUR_PASS_ID"
  data-checkify-request="age_over_18"
  data-checkify-text="Verify with Checkify"
></div>

See the embed API reference for configure(), events, and return URL handling.

Step 3

User completes verification

When the user taps Verify, Checkify opens the proof flow (in-browser or via the Checkify app on mobile). On success the SDK writes a request_id into your hidden checkify_token field so your backend can verify it.

Same Pass ID for every proof type on that site.
Human, age 18, and age 25 are selected in your HTML or bindForm options — not in the Pass settings.
Domain must match the site’s allowed domains list.
Available now: Pass start + app handoff

Launch options

Inline button
Embed widget or bindForm on your page.
QR / magic link
Physical locations and in-person flows via the dashboard.
Mobile handoff
User completes proof in the Checkify app and returns to your site.

Step 4

Verify on your server

Read request_id from the form POST, then call the verify endpoint with your site API key. Check approved claims (human_verified, age_over_18, etc.) before allowing the protected action.

Verify request (server)
POST https://checkify.me/v1/qr/results/verify
Authorization: Bearer YOUR_SITE_API_KEY

{
  "request_id": "uuid-from-checkify_token-field",
  "required_claims": ["human_verified"],
  "consume": true
}
Available now: POST /v1/qr/results/verify

After verify succeeds

Frontend
Enable submit, continue checkout, or show success — only after your server confirms verification.
Backend
Use required_claims and consume: true for one-time actions like signup or password reset.
Your policy
Allow checkout, unlock content, create the account, or approve the staff action based on approved claims.

Production-ready for websites

Create a site, copy one Pass ID, embed the SDK, and verify with a site API key. WordPress and WooCommerce use the same model.

Use now

JavaScript embed, bindForm, server verify API, site API keys, WordPress plugin, business dashboard.

Roadmap

npm package, webhooks, signed webhook delivery, native mobile SDK guides.

Start integrating

Create your site in the business dashboard, copy your Pass ID, and follow the developer quickstart. WordPress sites can use the plugin with the same Pass ID.