Checkify
对于企业

用可信的、隐私优先的请求取代高摩擦验证

从一个流程开始,例如CAPTCHA替换、年龄检查或敏感帐户操作。

Checkify帮助企业请求诸如人员存在或年龄阈值之类的证明,而无需收集超出必要的个人数据。获得清晰的结果,减少摩擦,并保持审计就绪跟踪。

为什么企业使用Checkify

降低用户摩擦。降低企业的责任。

减少数据责任

尽可能要求提供证据,而不是收集原始身份证明文件。

更好的用户体验

用更简单的基于手机的审批流程取代重复的检查和尴尬的难题。

审核就绪事件

记录请求、时间戳和无需持有不必要的个人数据即可获得结果。

工作原理

从请求到可信结果的简单路径。

1

创建请求

选择您要验证的内容,例如人员存在、年龄阈值或用户操作的更强证据。

2

显示请求

使用实时 QR 或启动器将其呈现在您的网站流程、应用程序或物理位置中流程。

3

接收结果

获得您需要的证明或决策结果,而无需成为不必要数据的长期持有者。

Setup paths

Choose your setup path

Physical locations and websites are configured separately under Manage sites in the Checkify app. Pick the path that matches where you need verification.

Physical locations

Set up a physical location

Use the Checkify app: Settings → Manage sites → Physical locations.

步骤1

Open Physical locations

In the Checkify app, open Settings → Manage sites → Physical locations. This is where you manage venues, offices, and in-person scan points.

结果:Physical locations open
Manage sites in the Checkify app

步骤2

Add physical site

Tap Add physical site, enter the site name and location, then save. Checkify auto-provisions one Pass for that site.

结果:Physical site created
Each physical site gets its own Pass. You can add access areas or show an age QR from the site card after it is created.

Steps 3 onward

Choose how people verify on site

After your physical site is created, pick one of these paths. Use a one-time age QR for simple checks, or access areas when members should enroll once and scan to enter each visit.

Age QR (one-time check)

  1. Select age and assurance level

    On the site card, choose the minimum age threshold and assurance level (Verified or High Assurance).
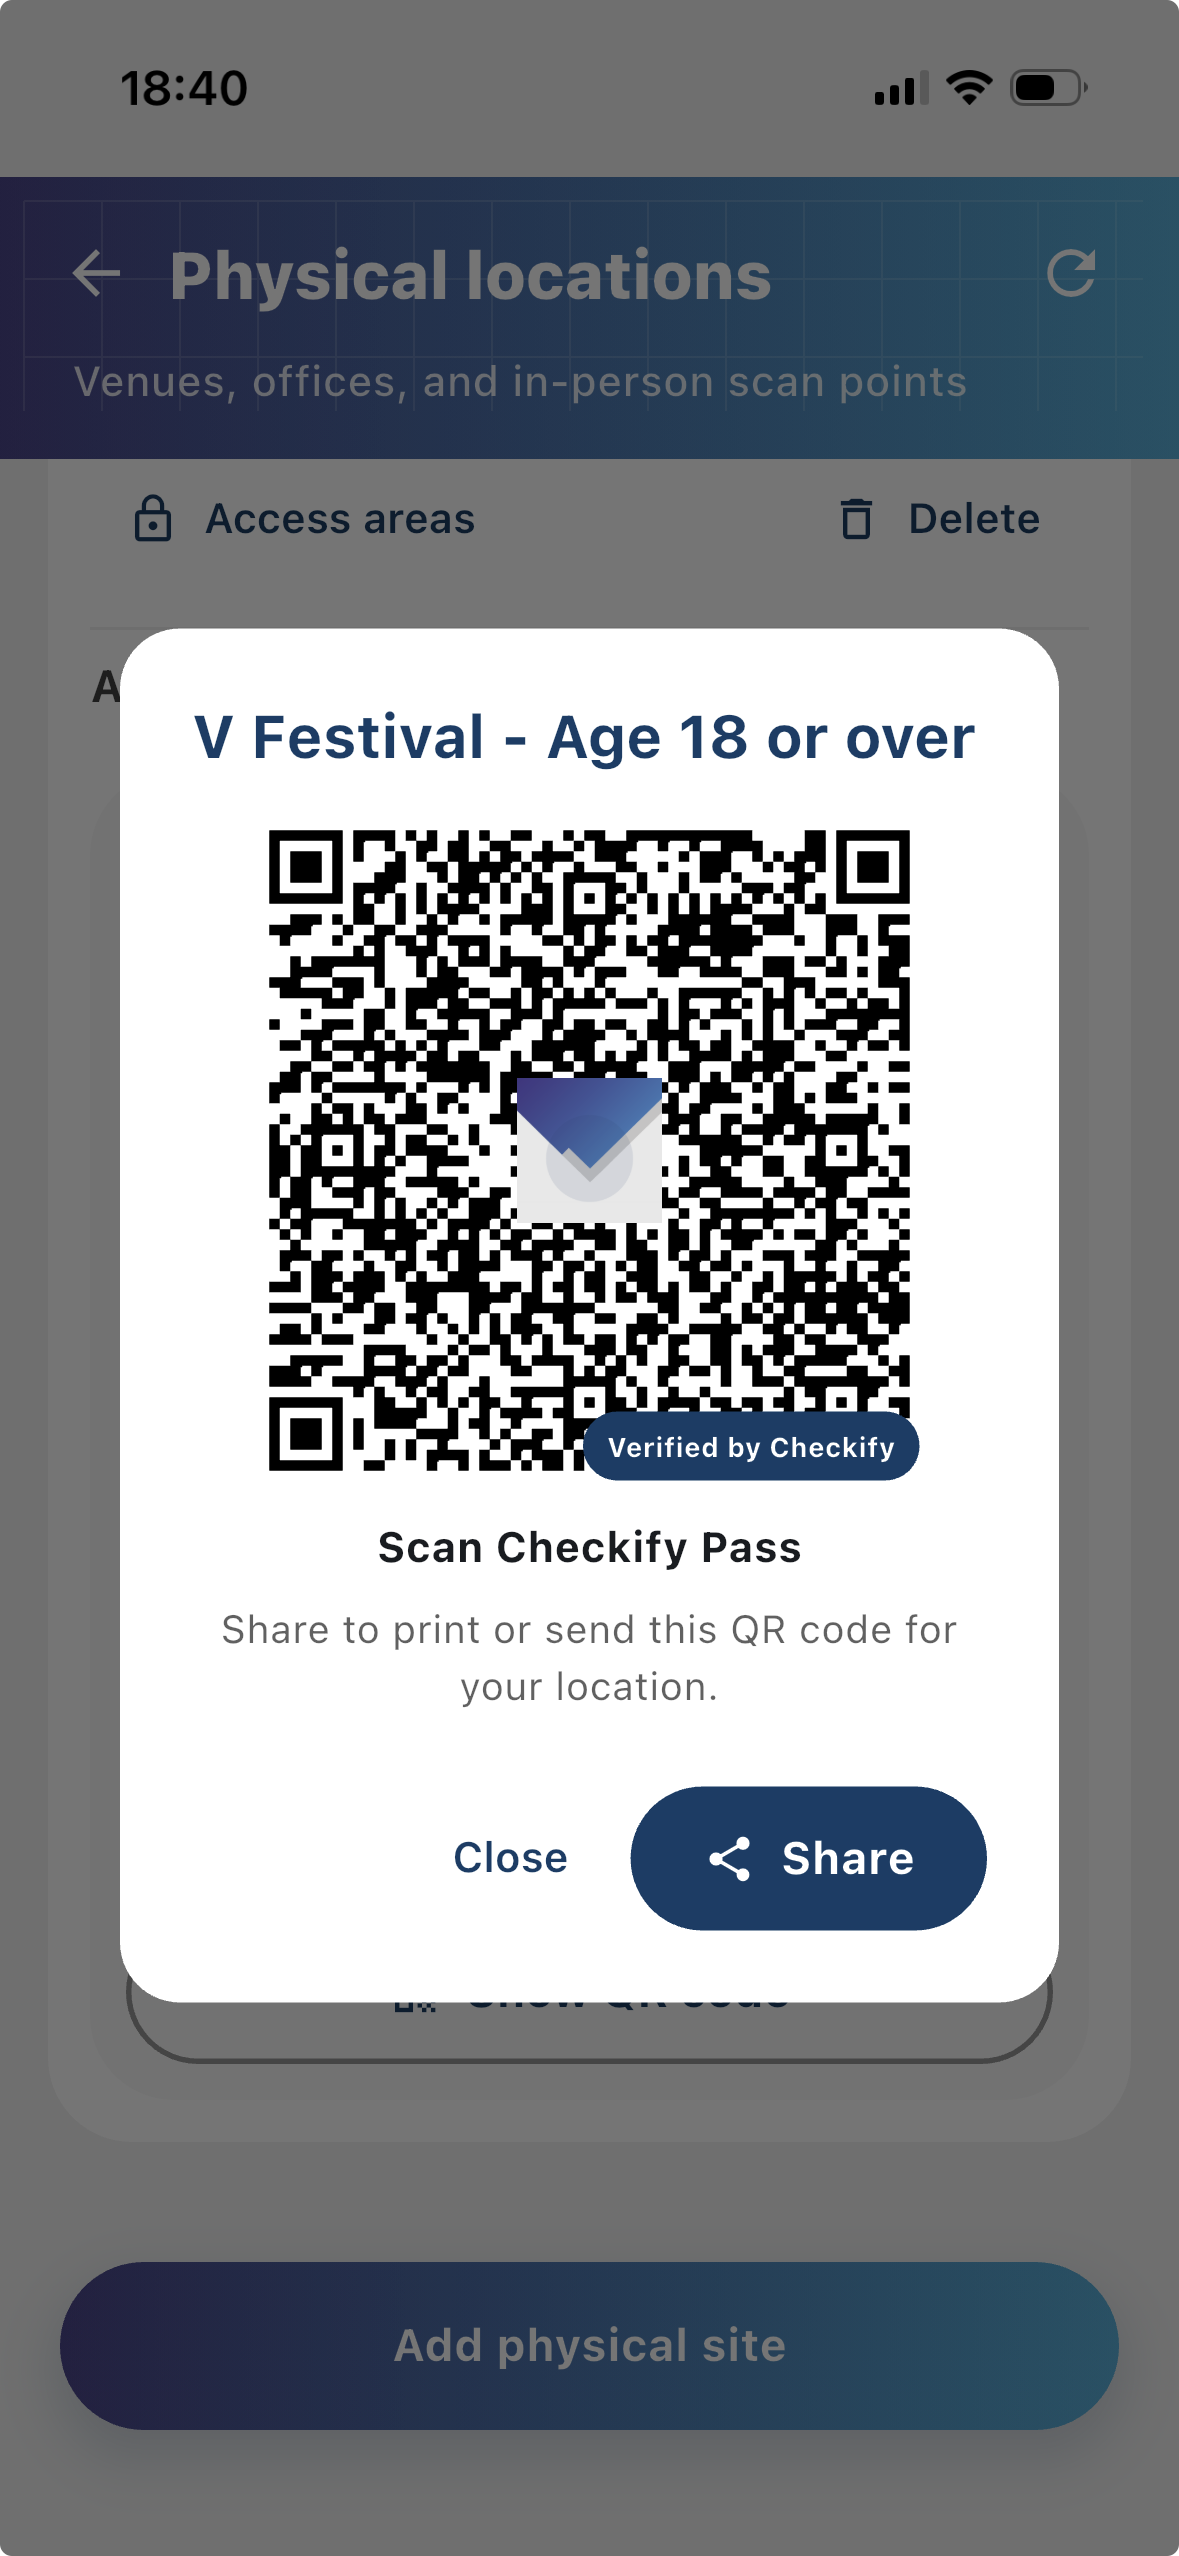
  2. Show QR code

    Tap Show QR code, then share or print the code for customers to scan with the Checkify app.

Access areas (repeat entry)

  1. Open Access areas

    On the physical site card, tap Access areas.

  2. Add access area

    Create an area for a door, lounge, staff zone, or counter. Choose manual or auto-approve enrollment.

  3. Show enrollment QR

    Tap Show enrollment QR and share it so first-time visitors can register their device for that area.

  4. Show entry QR or gate display

    For day-to-day entry, tap Show entry QR for a printable door code, or Open gate display to run the live scanner screen on a tablet.

Example

Show QR code

Tap Show QR code, then share or print the code for customers to scan with the Checkify app.

结果:QR ready to share
Show Checkify Pass QR for a physical location
Websites

Set up a website

Use the Checkify app or business dashboard: Settings → Manage sites → Websites (app) or Sites in the dashboard.

步骤1

Open Websites

In the Checkify app, open Settings → Manage sites → Websites. You can also add websites from the business dashboard under Sites.

结果:Websites list open
Manage sites in the Checkify app

步骤2

Add website

Tap Add website (app) or Add Website (dashboard). Enter your site name and list allowed domains where Checkify can run (comma-separated). Checkify auto-provisions one Pass when you save.

结果:Website and Pass ready
Add website in business dashboard

步骤3

Copy Pass ID

Open the site and tap Copy Pass ID. Paste it into Checkify Connector, your JavaScript embed, WooCommerce settings, or custom integration code. Set the request type (human, age_over_18, etc.) in the plugin or embed — not in the Pass ID itself.

WordPress integration guide →

结果:Ready to integrate
Copy Checkify Pass ID

准备好在一个流程上测试Checkify了吗?

从单一业务旅程开始,端到端地查看体验,并在准备就绪后进行扩展。